
Easy Turkey Neck Gravy Recipe
Table of Contents
Every Thanksgiving, I remember my grandmother’s kitchen filled with the rich, savory aroma of turkey neck gravy. Her secret recipe made our holiday meals special, creating memories that last forever.
Learning how to cook turkey necks is more than a skill—it’s a tradition passed down through generations. This turkey neck gravy recipe will help you unlock deep, complex flavors. These flavors will make your holiday feast unforgettable.
Whether you’re a seasoned cook or a kitchen novice, this guide will help you create a gravy that will have your family asking for seconds. We’ll explore simple techniques to turn turkey necks into a luxurious sauce. This sauce celebrates the heart of Thanksgiving cooking.
Get ready to discover the art of crafting the most delicious turkey neck gravy. It will become your new holiday tradition.
Understanding Turkey Neck Gravy Basics
Exploring turkey neck recipes uncovers a secret that can change your holiday meals. Turkey necks are not just extra parts of the bird. They are a flavor treasure that can make your gravy amazing.
Learning the basics of turkey neck recipes is key. Giblets, the inside parts of poultry, add a lot to your cooking. These include:
- Turkey neck
- Heart
- Liver
- Gizzards
What Are Turkey Giblets and Neck?
The turkey neck is a great ingredient that many miss. Knowing how long to cook turkey necks on the stove varies by recipe. Slow-cooking makes the meat tender and brings out its rich flavor.
Benefits of Using Turkey Necks in Gravy
Turkey necks bring many benefits to your gravy:
- Intense flavor development
- Rich, deep coloration
- Added nutritional value
- Cost-effective ingredient
Essential Equipment Needed
To make the best turkey neck gravy, you’ll need these tools:
- Large heavy-bottomed pot
- Sharp kitchen knife
- Strainer
- Whisk
- Measuring cups
Knowing these basics of turkey neck cooking will help you make a gravy that wows everyone at your next holiday meal.
Ingredients for Perfect Turkey Neck Gravy
Making a tasty turkey neck gravy begins with picking the right ingredients. Knowing how long to cook turkey necks is key to getting rich flavors in your gravy.
Here’s what you need for a top-notch turkey neck gravy:
- Fresh turkey necks
- Turkey giblets
- Low-sodium chicken or turkey broth
- All-purpose flour
- Unsalted butter
- Fresh herbs (thyme, rosemary)
- Salt and black pepper
When cooking turkey necks, remember that times can differ. Usually, turkey necks need 1-2 hours of slow cooking to get tender and full of flavor. This slow cooking breaks down the meat, making a great base for your gravy.
| Ingredient | Quantity | Purpose |
|---|---|---|
| Turkey Necks | 2-3 pieces | Primary flavor base |
| Chicken Broth | 4 cups | Liquid foundation |
| All-Purpose Flour | 1/4 cup | Thickening agent |
| Butter | 4 tablespoons | Richness and texture |
Pro tip: Choose fresh, quality turkey necks from your local butcher. The fresher the ingredients, the more delicious your gravy will taste.
Preparing Your Turkey Neck and Giblets
Turning turkey necks into a tasty gravy is all about preparation. Learning how to cook them right ensures great flavor and safety. The right steps can make these parts a highlight of your dishes.
Start by handling your turkey necks carefully. Clean preparation is key for a safe and delicious meal.
Proper Cleaning Techniques
Cleaning turkey necks needs focus. Here’s what to do:
- Rinse the turkey necks under cold water
- Pat dry with clean paper towels
- Remove any fat or loose skin
- Check for feathers or debris
Initial Cooking Methods
Several ways can bring out the flavors in turkey necks:
- Simmering: Cooks meat gently in liquid
- Roasting: Brings out deep, caramelized tastes
- Braising: Uses both dry and wet heat for tenderness
Extracting Maximum Flavor
“The secret to great gravy is coaxing out every bit of flavor from your turkey necks.” – Professional Chef
Here are some expert tips for getting the most flavor:
- Brown the necks before simmering for more taste
- Add aromatic veggies like onions and celery
- Season with herbs and spices while cooking
- Save the cooking liquid for your gravy
Creating the Perfect Gravy Base
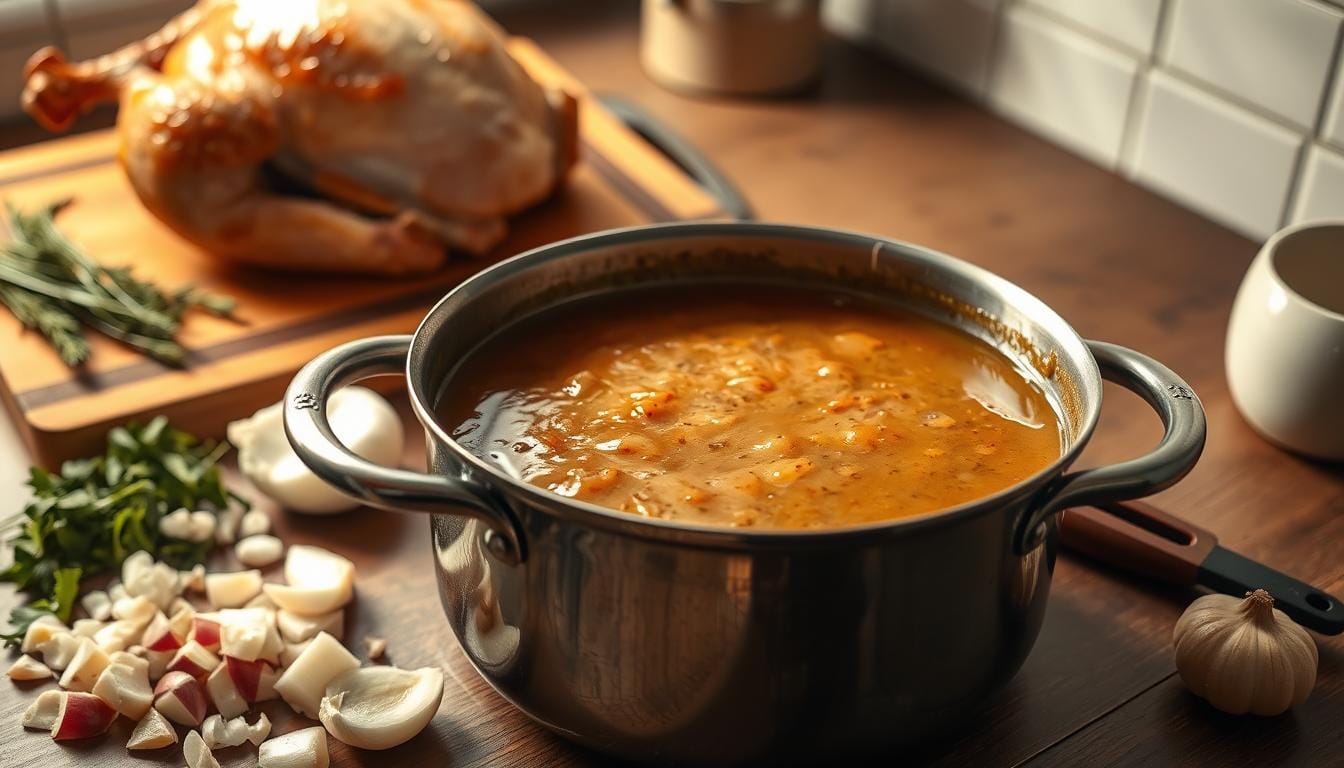
Making a great turkey neck gravy begins with a solid base. Your gravy’s success hinges on a smooth, flavorful start. This will make your holiday meal unforgettable.
The key to a rich turkey neck gravy is a perfect roux. This mix of fat and flour makes your gravy silky and smooth. Here’s how to get it right:
- Select high-quality fat from turkey drippings
- Use equal parts flour and fat
- Cook the roux until it reaches a golden brown color
- Whisk consistently to prevent lumps
Creating your turkey neck gravy requires focus on temperature and technique. Start by melting butter or using turkey fat in a heavy pan. Slowly add flour, making a paste that thickens your gravy and adds rich flavor.
| Roux Type | Color | Cooking Time | Flavor Profile |
|---|---|---|---|
| White Roux | Pale | 2-3 minutes | Mild |
| Blond Roux | Light Golden | 5-6 minutes | Nutty |
| Brown Roux | Dark Brown | 10-15 minutes | Intense |
Pro tip: The longer you cook your roux, the darker and more complex the flavor becomes for your turkey neck gravy.
“A great gravy is the difference between a good meal and an unforgettable feast.” – Professional Chef
How to Make Turkey Neck Gravy
Making delicious turkey neck gravy takes patience and the right steps. Learning how to cook turkey necks turns simple ingredients into a rich, flavorful sauce. This sauce will make your meal even better.
The secret to great gravy is knowing the cooking process and mastering key techniques. Let’s go through the steps to make a gravy that will wow your dinner guests.
Step-by-Step Cooking Process
- Clean turkey necks under cold water
- Pat the necks dry with paper towels
- Put necks in a large stockpot with cold water
- Heat it gently over medium heat
- Cook for 45-60 minutes until it’s tender
Achieving the Right Consistency
Remember, slow cooking is essential when learning how long to cook turkey necks on the stove. The liquid should reduce slowly. This makes the flavors concentrate and the base thick and rich.
| Cooking Stage | Time | Expected Result |
|---|---|---|
| Initial Simmer | 30 minutes | Meat starts to soften |
| Reduction Phase | 15-30 minutes | Liquid gets thicker |
Seasoning Tips and Tricks
- Use kosher salt and freshly ground black pepper
- Add herbs like thyme and rosemary
- Include a splash of white wine for depth
- Strain the gravy for a smooth texture
“The key to great gravy is patience and layering flavors” – Professional Chef
By using these techniques, you’ll make a turkey neck gravy that’s rich, smooth, and full of flavor. Your guests will definitely ask for more!
Troubleshooting Common Gravy Issues

Making turkey neck gravy can sometimes present challenges, but with the right techniques, you can rescue your sauce and create a delicious accompaniment to your meal. Understanding common gravy problems will help you become a master of turkey neck gravy preparation.
Fixing Lumpy Gravy
Lumpy turkey neck gravy can ruin the texture of your dish. To smooth out your sauce, try these effective methods:
- Use a whisk to break up lumps while heating
- Strain the gravy through a fine-mesh sieve
- Blend the gravy using an immersion blender
Addressing Thin Consistency
When your turkey neck gravy lacks thickness, you have several options to improve its texture:
- Create a cornstarch slurry by mixing cornstarch with cold water
- Slowly whisk the slurry into the simmering gravy
- Simmer the gravy to reduce and thicken naturally
Enhancing Flavor
If your turkey neck gravy tastes bland, try these flavor-boosting techniques:
- Add fresh herbs like thyme or sage
- Incorporate a splash of white wine
- Season with additional salt and black pepper
- Use homemade turkey stock for deeper flavor
Remember, practice makes perfect when creating turkey neck gravy. Don’t get discouraged if your first attempt isn’t flawless. Each batch will help you refine your technique and develop confidence in your cooking skills.
Storage and Make-Ahead Tips
Planning ahead can make your turkey neck recipes even more convenient. Knowing how to properly store and reheat your delicious gravy ensures you’ll enjoy restaurant-quality flavor without last-minute stress.
Turkey neck recipes often yield more gravy than you might need for a single meal. The good news is that your homemade gravy can be prepared well in advance, saving you precious time during holiday cooking.
Refrigeration Methods
Your turkey neck gravy can be safely stored in the refrigerator with these simple steps:
- Cool the gravy completely before storing
- Use an airtight container with a tight-fitting lid
- Store in the refrigerator for up to 3-4 days
- Place a layer of plastic wrap directly on the gravy’s surface to prevent skin formation
Freezing Your Gravy
Freezing is an excellent option for extending the life of your turkey neck recipes gravy:
- Use freezer-safe containers or heavy-duty freezer bags
- Leave about 1/2 inch of space at the top for expansion
- Freeze for up to 3 months
- Label containers with the date of preparation
Reheating Instructions
When you’re ready to enjoy your stored gravy, follow these reheating tips to maintain its rich texture:
- Thaw frozen gravy in the refrigerator overnight
- Reheat on the stovetop over low heat
- Stir frequently to prevent scorching
- Add a little broth or water if the gravy seems too thick
“Proper storage is the secret to keeping your turkey neck recipes tasting fresh and delicious!” – Professional Chef
Pro tip: Always taste and adjust seasonings after reheating to ensure your gravy tastes as good as when you first made it.
Serving Suggestions and Pairings

Your homemade turkey neck gravy makes any meal special. It adds flavor and warmth to your table.
Classic dishes pair well with turkey neck gravy:
- Roasted turkey (of course!)
- Creamy mashed potatoes
- Sage-infused stuffing
- Roasted vegetables
- Buttermilk biscuits
Try something new with your turkey neck gravy. Drizzle it over:
- Open-faced sandwiches
- Shepherd’s pie
- Savory bread pudding
- Roasted chicken
How you serve your turkey neck gravy matters. Warm your gravy boat before pouring. This keeps the sauce just right. Serve it on the side, so everyone can add as much as they like.
| Dish | Gravy Pairing Recommendation | Flavor Profile |
|---|---|---|
| Mashed Potatoes | Heavy drizzle | Creamy, rich |
| Stuffing | Light coating | Herbal, savory |
| Roasted Turkey | Generous pour | Deep, meaty |
Pro tip: Keep extra turkey neck gravy warm in a slow cooker. This way, it stays perfect for serving.
Conclusion
Making delicious turkey neck gravy is simpler than you might think. With the right techniques and a bit of practice, you can turn simple turkey necks into a rich, flavorful sauce. This sauce will make any holiday meal even better.
Learning to cook turkey necks takes patience and attention to detail. By following the steps in this guide, you’ll impress your family and friends. It’s not just about making a sauce; it’s about keeping culinary traditions alive and warming your table.
Your homemade turkey neck gravy is more than just a condiment. It connects you to generations of home cooks who turned simple ingredients into something amazing. Try different seasonings and make this recipe your own.
Great cooking comes from confidence and a willingness to learn. Whether you’re experienced or new to cooking, these turkey neck recipes will help you make a gravy that tells a story. Enjoy the journey of mastering this classic culinary art.
FAQ
How long does it take to cook turkey necks for gravy?
Can I make turkey neck gravy ahead of time?
What can I do if my turkey neck gravy is too thin?
Are turkey necks necessary for making gravy?
How do I prevent lumps in my turkey neck gravy?
Can I use turkey neck gravy with other meats?
What’s the best way to store leftover turkey neck gravy?
Did You Try Our Recipe?
There are no reviews yet. Be the first one to write one.